

- As the most popular web platform, WordPress is already powering up over one-third of the entire website.
- Hundreds of people are entering the community every day. If you too are one of them, we are welcoming you with this easy and beginner-friendly tutorial- “How to Install WordPress on Localhost” in five easy steps.
- Learning WordPress is just fun. Nowadays, anyone can build a website for his/her blogging business or any other purpose within minutes. Yes, CMS (Content Management System) made it much easy for all of us. And WordPress is leading the CMS industry with a surprising market share of more than 60%

5 Easy Steps To Install WordPress On a LocalHost
Step 1- Download XAMPP
Step 2- Install & Run the XAMPP on Your PC
Step 3- Download WordPress Latest Version
Now is the time to create a database and start installing WordPress on localhost. To do that, you need to download the latest version of WordPress.
- Go to the WordPress official website, and click on the Get WordPress button from the top right side. You will be redirected to a new page.
- Now hit on Download WordPress button.
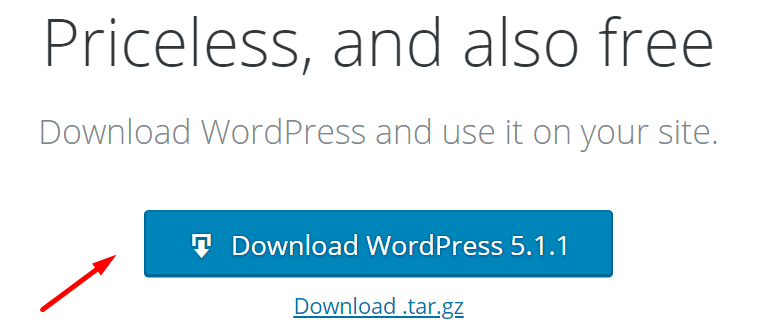
The download process might take a few moments to begin. You will get a zip file. Unzip the file and copy that for your next use.
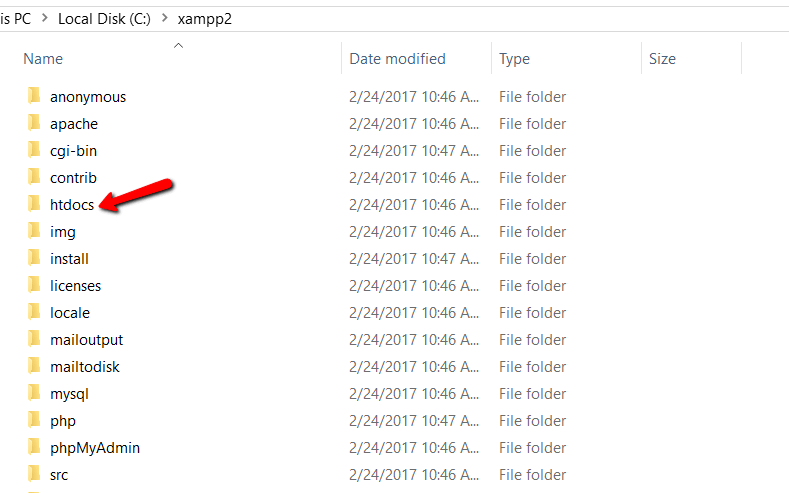
Step 4- Create a Database
To create a database, first, you need to prepare
- Go to your local disk, where you saved the downloaded XAMPP file.
- Select the htdocs folder and paste the WordPress latest
version you copied earlier.
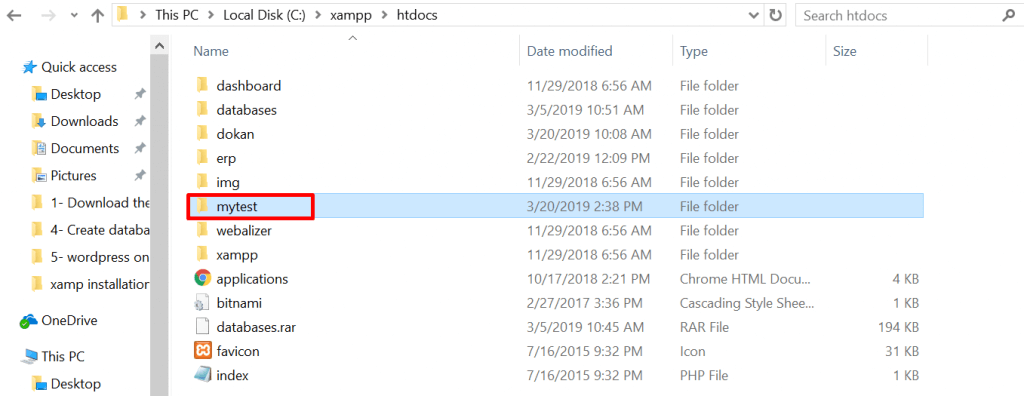
Now, rename the WordPress folder. You can avoid this
We named the folder here ‘mytest'. Check the below screenshot. You should remember the name you have selected for your database.
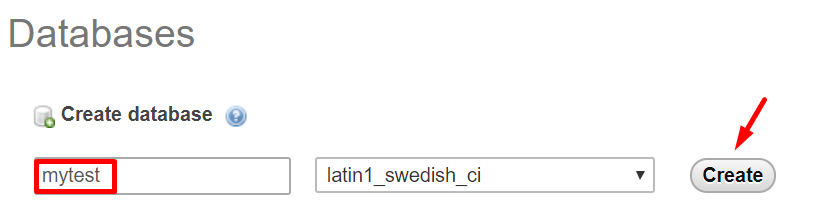
- Now, open a new tab on your browser and go to localhost/
PHPMyAdmin
- Select Database
- Write the same name you have written on your local disk. And finally, click on the Create button. Your database will be created within a few seconds.
You have successfully created your localhost database. Now, is the turn to install WordPress on the localhost.
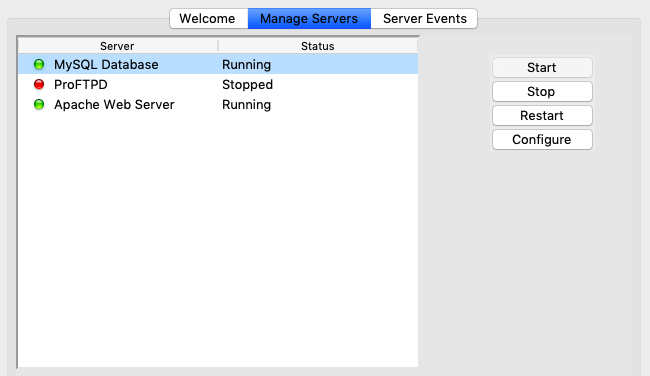
Note: Before going to the final step, you need to start both Apache Web Server and MySQL Database from the Xampp control panel installed on your PC or Mac. Without starting both of them, you can't get access to PHPMyAdmin.
Just go to your app folder. Select the Xampp control panel and click on MySQL and Apache buttons. Have a look at the below screenshot.
Step 5- Install WordPress on Localhost
Open a new tab on your browser and write localhost/your given name (‘
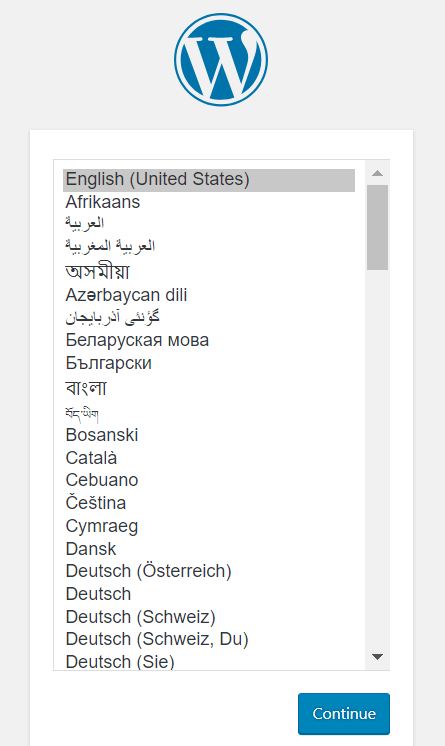
- Select your language and click on continue
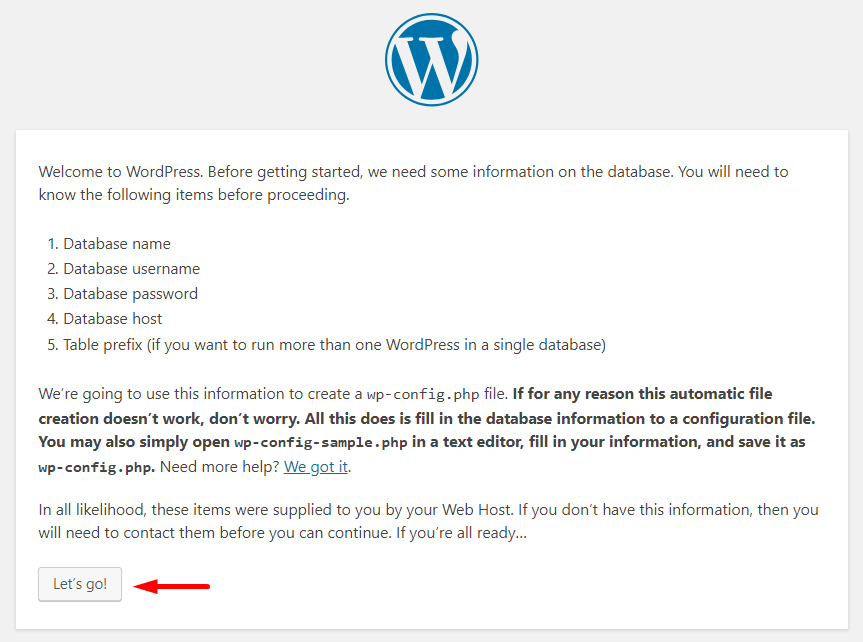
- You would see a welcome notice on behalf of WordPress. On the next step, WordPress will require
- A database Name
- A user name
- A password
- And a database host
- Just click on the Let's go button
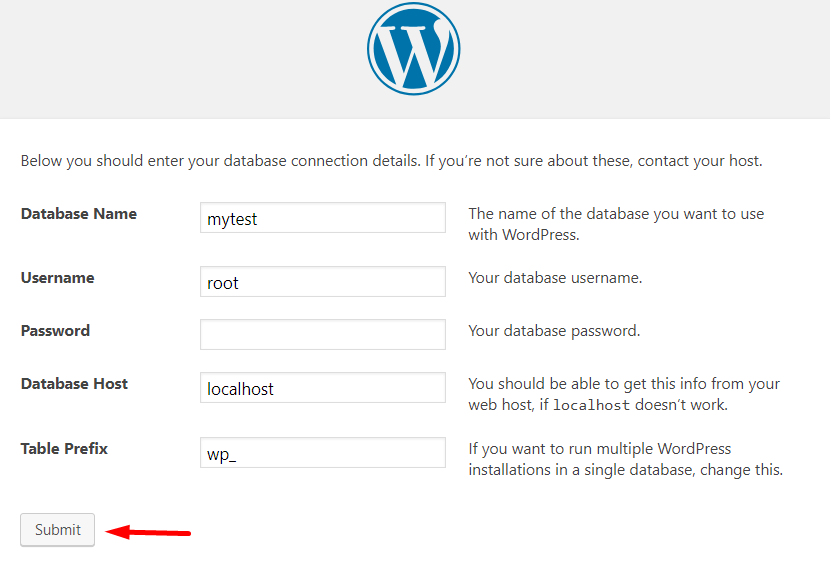
- These are the fields you can see in the below screenshot.
- Provide your database name, you can write ‘root' as user name, keep the password option blank- it's better and you would find other fields filled up from earlier.
- Click on Submit button
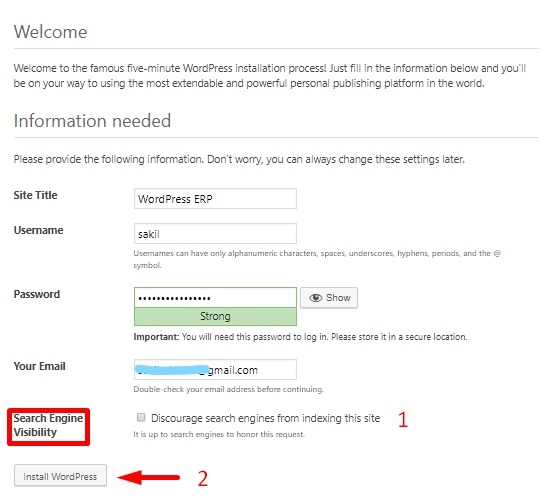
- This is your final step of installation.
- Give a name to your site. we named our site WordPress ERP here. You can also keep your database name as your site's name.
- Write your user name
- Give a strong password
- Write your personal e-mail address
- Carefully
check the search engine visibility button. Otherwise, Google would start indexing your local site too!
- And, finally, click on the Install WordPress button!
Yes, you have completed your installation. You should see a notice below.

Check out the Site You Have Built
This is the time to check out your local site. What would it look like or how would it work? Give a check.
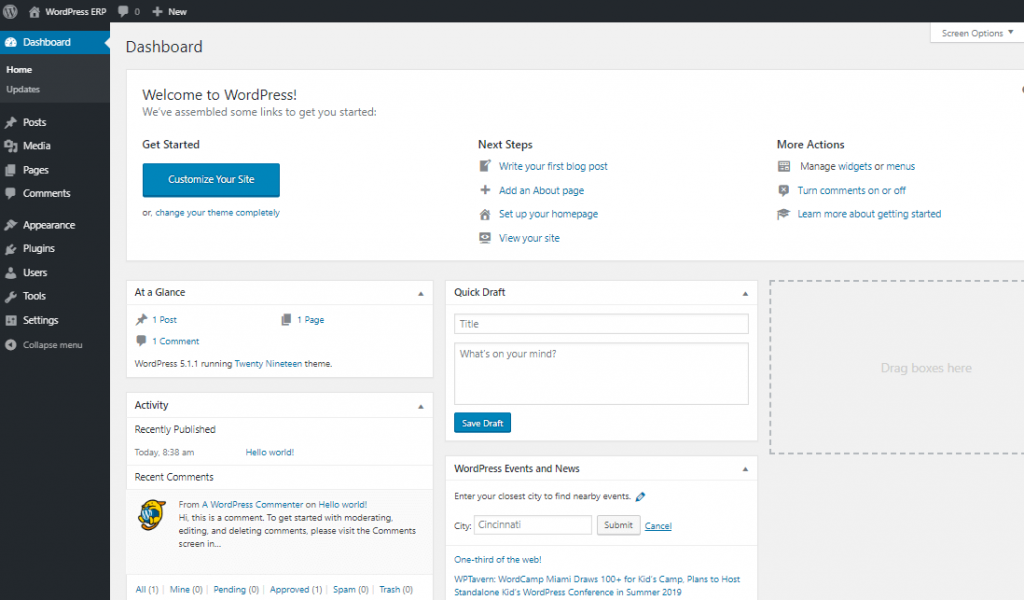
- This is your backend dashboard or admin panel, from where you would control everything.
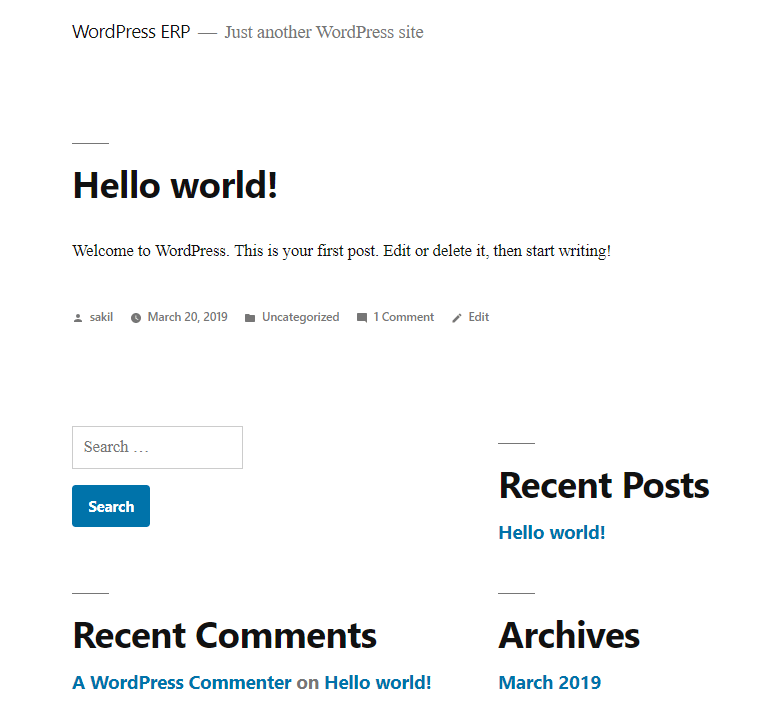
- And this is your front-end dashboard.
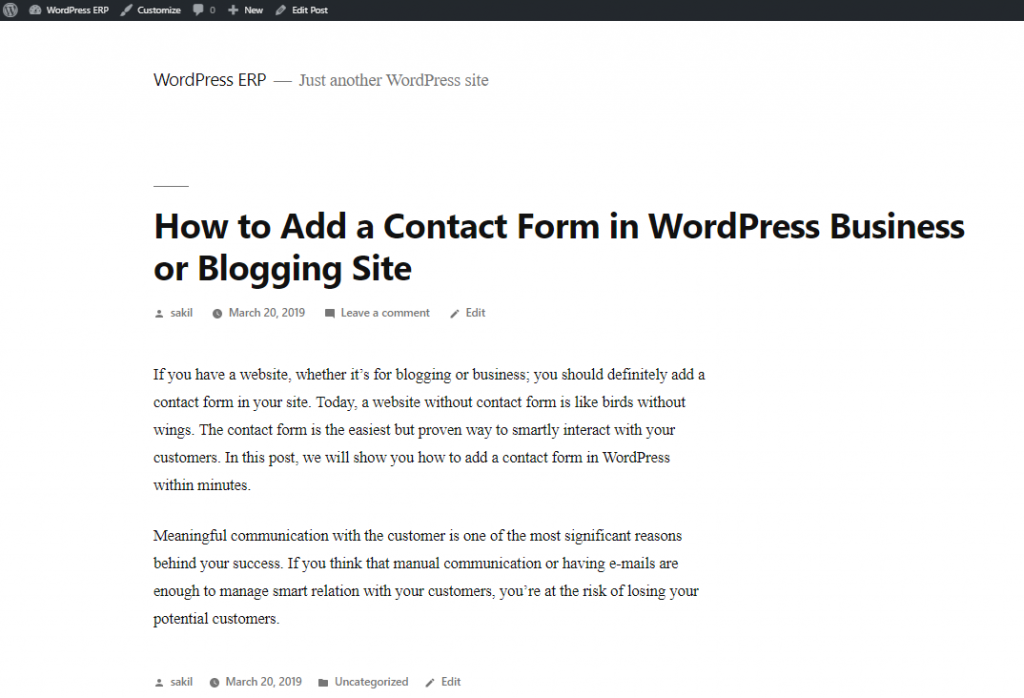
- You can check this by adding a new blog post or installing and activating a plugin/theme etc. We have published a blog post, it looks just like a live site- isn't it?
So, this was the total process of building a personal testing site in a local host environment. The process requires 5-10 minutes based on your capability.


0 Comments